Thursday, December 19, 2013
Tribal mask
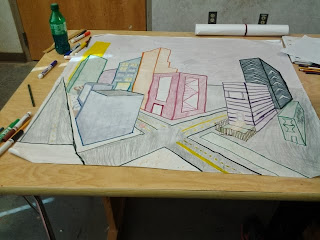
Group 2 point perspective landscape
As you can tell this isnt the best landscape ever but it is okay.
overlaping circle
This project was pretty hard to do but we had to cut out a circle devide it up,cut out a piece and draw a design on it. once we did we cut out another circle and copy the picture on it using light once you had to flip the cut out piece over and once you are done you can color over it.
overlaping sissors
we had to trace sissors over laping each other and where ever a line ended then we changed the colors. as you might be able to tell that thos wasign my best piece of work but I still tried.
symetrical and asymetrical pictures
we had to create asymetrical and symetrical pictures using shapes. we also had to balance the pictures so it would make it look pleasing to the eye. symetrical looks exactly the same while asymetrical can look compleatly diffrent but can't out weigh the other picture.
Hand project
Wednesday, December 18, 2013
Shading project
The purpose of this project was to create value and contrast. You make it by printing out a picture then gridding it on the grid scale once it is all done with and you have your picture sketched out then you break up the picture by either lines,jagged edges, or swirls depending on what your picture is. It it has more straight lines then you use curved but if it is mostly curved then you use the straight. Once it is all broken up then you start to shade creating contrast to where you can see the picture.
Subscribe to:
Comments (Atom)


.jpg)